|
|
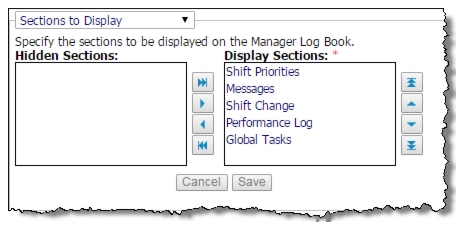
Determines the sections and statistics that appear on the Manager Log Book screen. All sections appear by default, and you must specifically remove them if you do not wish for them to appear. First, select ‘Sections to Display’ to determine the sections to appear and configure the controls for that section. Note: The Line items section and the Weather, Reminders, and Daily Specials sections always appear at the top of your Manager Log Book welcome screen and cannot be rearranged. Select ‘Daily Statistics’ to define the line items that appear in the Line Items section of the Manager Log Book.
|
|
|
|
|
|
|
|
|
|
|
|
|
|
|
By default, all sections appear. If you elect to not display all sections, you must select at least one section to appear on the Manager Log Book.
|
1.
|
Select Daily Statistics from the drop-down list.
|

|
2.
|
Select each line item you want to appear from the ‘Line Item Not Assigned’ list box and use the arrows to move the item to the ‘Line Item Assigned’ list box.
|
|
3.
|
Click Save.
|
|
1.
|
Select Sections to Display from the drop-down list.
|
|
2.
|
Select each section you want to appear from the ‘Hidden Sections’ list box and use the arrows to move the section to the Display Sections list box.
|
|
3.
|
Click Save.
|
|
1.
|
Select Sections to Display from the drop-down list.
|
|
2.
|
Select the section in the Display Sections list box and use the up and down arrows to move the section.
|
|
3.
|
Click Save.
|
|
1.
|
|
2.
|
Type the name of the new shift.
|
|
3.
|
Click Save.
|
|
1.
|
Select the shift in the list box.
|
|
2.
|
Click Edit.
|
|
3.
|
Type the new name of the shift.
|
|
4.
|
Click Save.
|
|
2.
|
Type the name of the new task.
|

|
3.
|
Click Save.
|
|
1.
|
Select the task in the list box.
|
|
2.
|
Click Edit.
|
|
3.
|
Type the new name of the task.
|
|
4.
|
Click Save.
|
|
2.
|
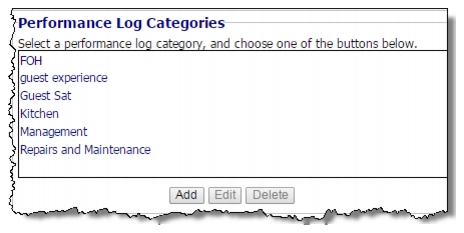
Type the name of the performance category.
|
|
3.
|
Click Save.
|
|
1.
|
Select the performance log category in the list box.
|
|
2.
|
Click Edit.
|
|
3.
|
Type the new name of the performance log category.
|
|
4.
|
Click Save.
|
|
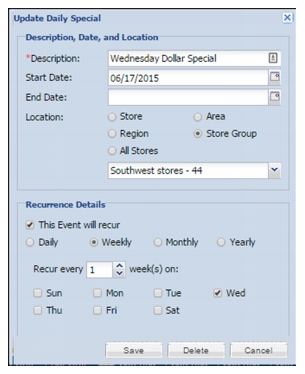
1.
|
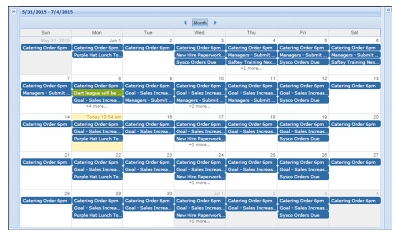
Select an empty area on the calendar date for which you want to add a special.
|
|
2.
|
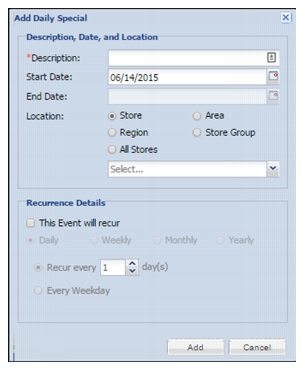
Click Add, or click the double-left-arrow in the top right corner of the calendar, to expand the Add Daily Special screen.
|
|
3.
|
Type the description.
|
|
4.
|
|
5.
|
Select a location:
|
|
6.
|
|
7.
|
Click the drop-down calendar and select the end date. If you want the recurring task to remain on the list for an indefinite time, select a date well into the future.
|
|
8.
|
Click Save.
|
|
1.
|
Select the date of the special you want to edit.
|
|
2.
|
Select the special from the list.
|
|
3.
|
Make your changes.
|
|
4.
|
Click Save.
|
|
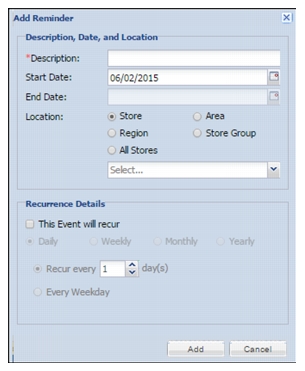
1.
|
|
2.
|
Type a description of the reminder.
|
|
3.
|
|
4.
|
Select a location:
|
|
5.
|
|
6.
|
Click the drop-down calendar and select the end date. If you want the recurring reminder to remain on the list for an indefinite time, select a date well into the future.
|
|
7.
|
Click Save.
|
|
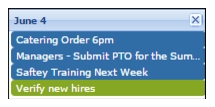
1.
|
Select the date of the reminder you want to update.
|
|
2.
|
Select the reminder from the list.
|
|
3.
|
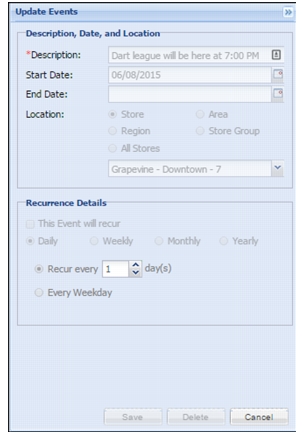
Double-click the reminder, to open the Update Events screen and make your changes.
|
|
4.
|
|
5.
|
Select a location:
|
|
6.
|
|
7.
|
Click the drop-down calendar and select the end date. If you want the recurring reminder to remain on the list for an indefinite length of time, select a date well into the future.
|
|
8.
|
Click Save.
|